First look at Universal Automation Desktop
There are many ways to do automation scheduling – whether its Jenkins or even Windows Task Scheduler. Each toolset has its place or specialization today we are looking at the son of Ironman Software’s PowerShell Universal Automation platform – the Desktop Edition!
The Desktop edition replicates some of the same functionality as the Universal Automation platform, however, aimed more at being able to drive automation scheduling from your Desktop! Entirely for someone like me who likes to do a certain amount of automation from the Desktop but has a particular distaste for scheduled tasks – like the Universal Automation platform this is entirely driven for PowerShell!
“Desktop edition comes packaged as an Electron app that provides all the great automation features of UA without role-based access, remote access or authentication.”
You can use Universal Automation Desktop for free as a trial:
-
25 Jobs per day
-
Up to 2 concurrent jobs
We are going to be using the Trial here – however, per-user pricing can be found at the following link: Universal Automation
The toolset is quite intuitive a lot of below isn’t worth going into how do use it - as it seems to be easy to pick up but its always pleasant to have it documented and referable! In my example below, we are going to create a Resource Group in Azure.
- TOC {:toc}
Install Universal Automation Desktop:
Unlike Universal Automation & Universal Dashboard, installation of the Universal Automation Desktop is packaged into an executable.
- Download the latest Universal Automation Desktop installer (bottom of the download pages – at time of writing the installer is 120MB and version 1.0.0)
- Installation of Universal Automation Desktop is pretty straight forward,
just run the downloaded installer:
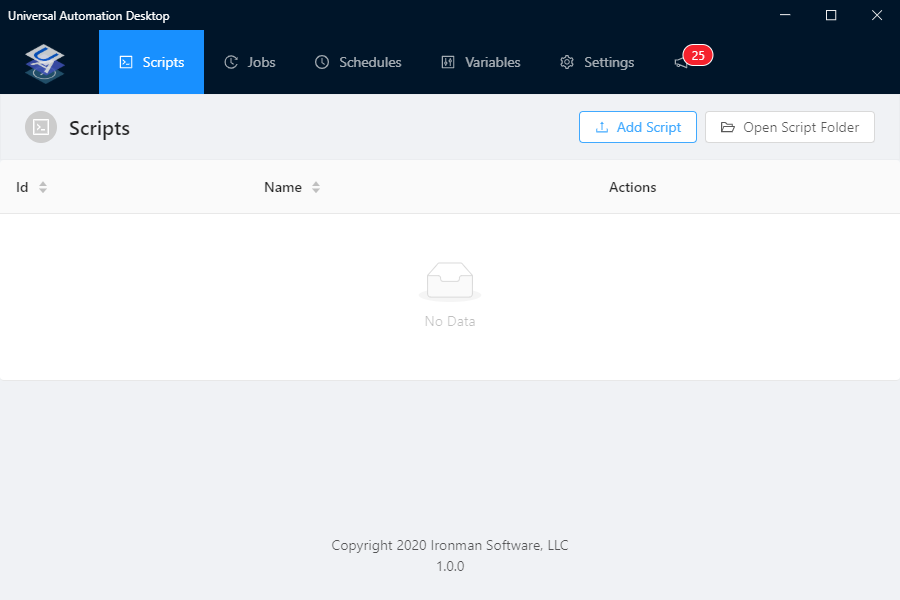
- Once complete, Universal Automation Desktop will load.
Use & Configure Universal Automation Desktop:
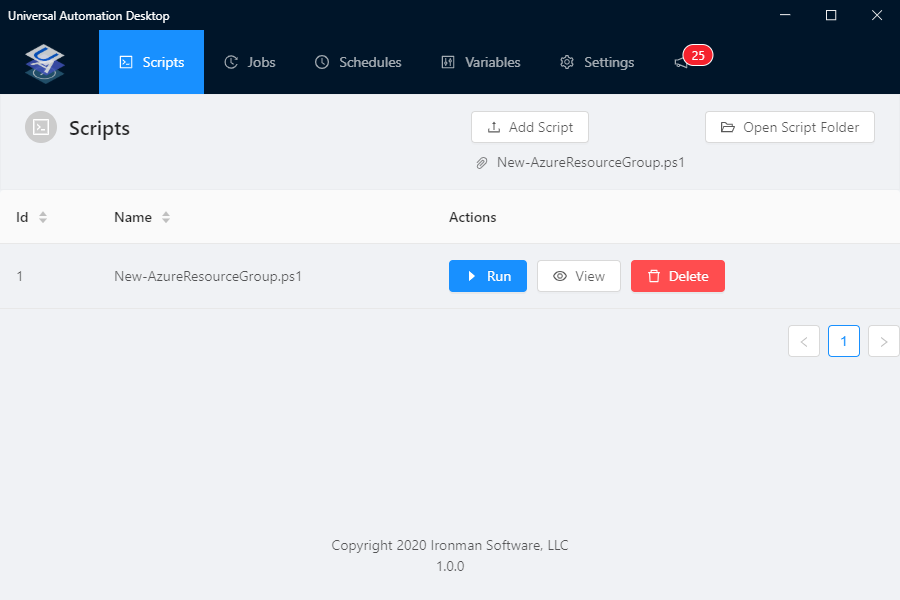
Add Scripts
Universal Automation supports git, so a Repository folder is created automatically – any scripts that you add will automatically be added to it:
%LOCALAPPDATA%\UniversalAutomation\Repository
- On the Scripts pane select Add Scripts
- Select the script you want to upload – in my example; I am using ‘New-AzureResourceGroup.ps1’ the script I created for quickly testing some of the functionality.
Gist of script found below, but its also in my GitHub Repository under Azure (GitHub link on the site menu).
- Once added you should see the script appear and you should be able to see it
in the Repository folder now:
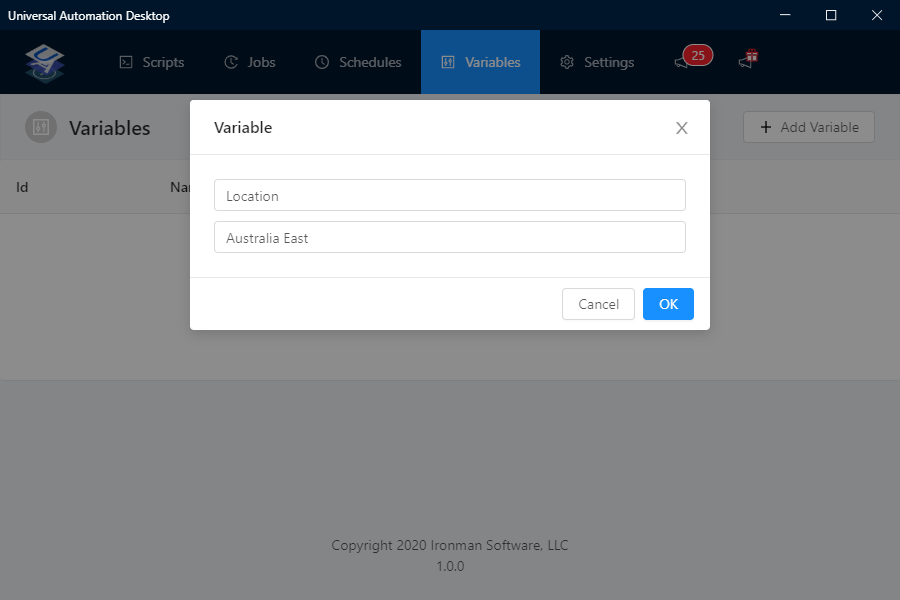
Add variables
Universal Automation Desktop supports variables.
- Click on the Variables menu item
- Select Add Variable
- In my example, I am adding the location that the Resource Group will be created, so it is going to be the following Key = Value pair: Location = Australia East
- Click Ok to save
Note: Location is a variable in my script, I also tested manually setting the name of the Resource Group as well with the Name value as well and worked well.
Note: The Variables are not encrypted! They are in plain text under:
Repository\.ua\variables.ps1
I did have a few issues with the UI freezing on me, so also discovered that I can manually add variables to this file and after a restart, it seemed to be picked up by Universal Automation as well.

Change PowerShell version
This is an interesting feature, that allows you to specify what Version of PowerShell you can have the scripts run under (in this example I will be adding PowerShell 7 preview). We do not need this for my example.
Note: If you do not see the below, you may need to update – Automation Desktop will update automatically and should notify you – close and restart Automation Desktop to continue (if you get an error message – navigate to your notification tray by the time and Quit any open Universal Automation Desktop applications you have open and then relaunch).
- Click Settings
- Navigate down to PowerShell versions
- Click Add New Version
- A new Table row will appear (Version\Path)
- In Version we are going to type in: PowerShell 7-preview (x64)
- In path type in: C:\Program Files\PowerShell\7-preview\pwsh.exe
- Press Enter
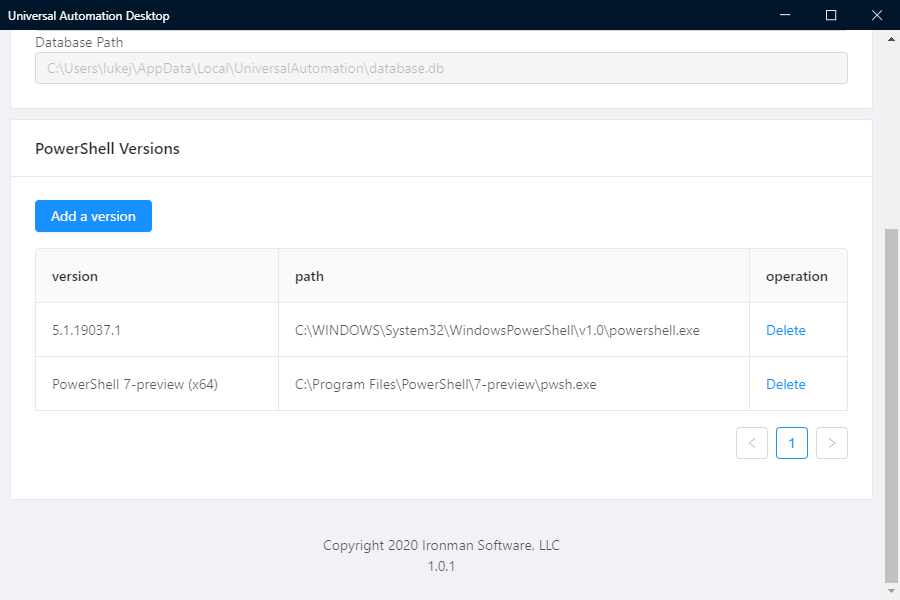
Now when you run your scripts, you can now specify what Version of PowerShell to use!
Run the script
Now that the variables have been set up and the script has been added, we can then Run it.
- On the scripts pane select ‘New-AzureResourceGroup.ps1’ and select Run

- Specify the PowerShell version – I believe automating this selection is
currently in the backlog: - and click Run

- The script will now go to the Jobs screen:
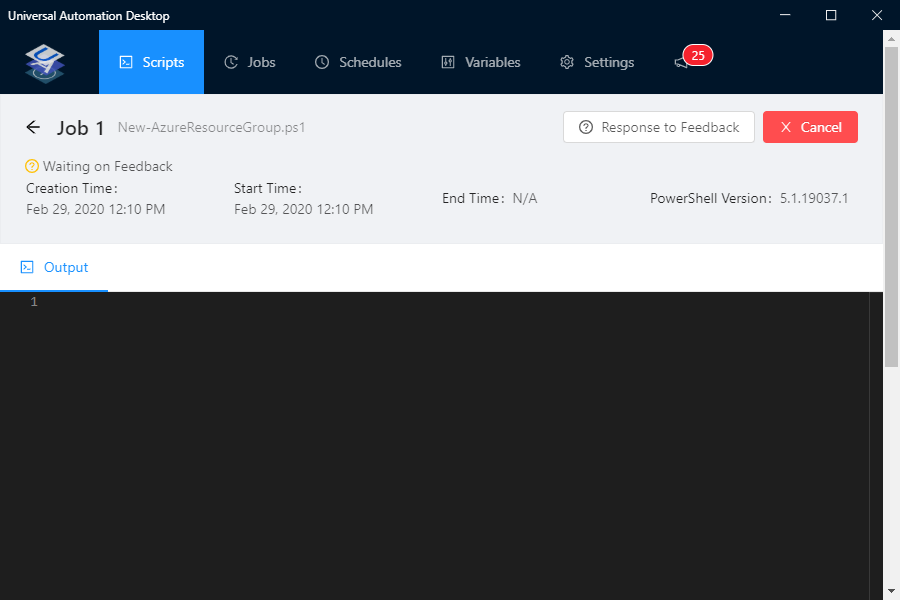
- Usually, the script would just run – but in my case, I have a parameter in my PowerShell script to request the name of the Resource Group we are going to create, click on Response to Feedback icon
- Type in the name of the Resource Group we are going to create – in my
example I am going with: UAutomationRGTest and click Ok
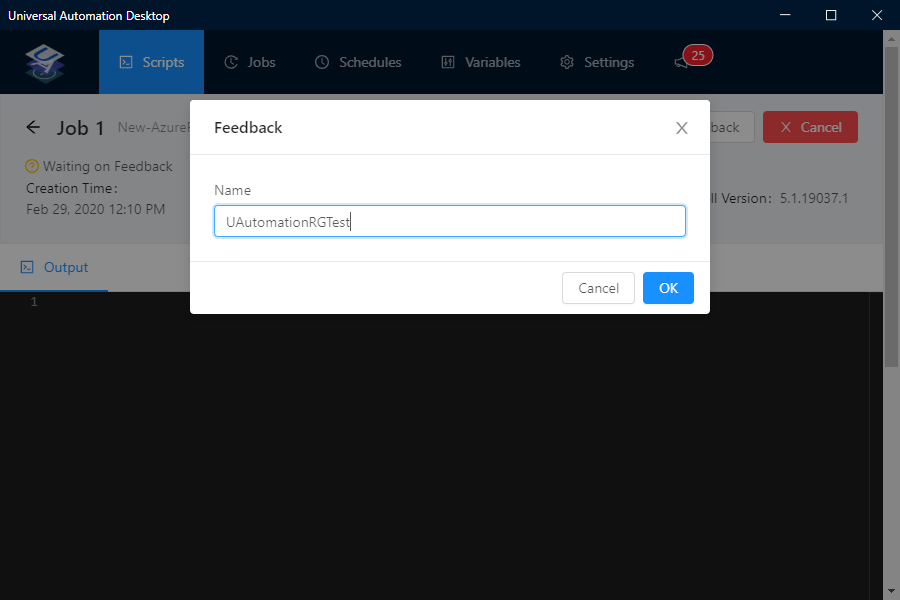
- It will now run the script:

- My new Resource Group has been created in Azure, using the name specified in the Parameter (UAutomationRGTest) and the Location (Australia East) that was set in the Variables!

Scheduling scripts
Although at this stage, I am not scheduling any of my scripts to run – it is a core function of the toolset.
- Click on Scripts
- Select the script you want to schedule and select View
- On the right-hand side blade next to Edit, click on the ellipsis (i.e.…)

- Select Schedule
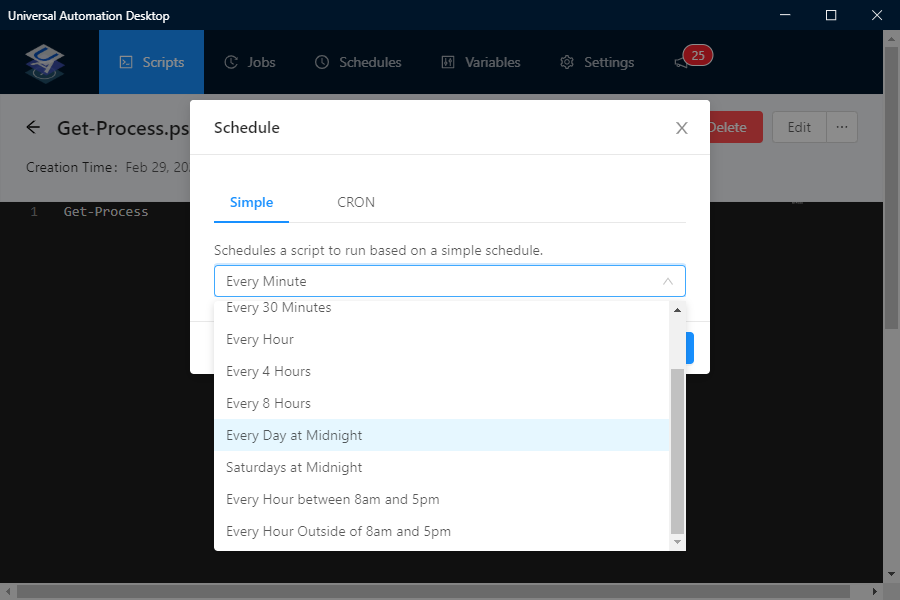
- Specify the schedule you want and click Ok
You should now see the Schedule under Schedules and view the Job history under Jobs.
Overall opinion
Long story short - Universal Automation has a place and is a toolset I will be looking at more closely and using!
I see myself using it to utilize PowerShell and automation a bit more in completion of general day to day activities (both personal and professional) and service requests - without having to worry about moving to the next step with a bigger toolset.
If I use a script often enough – then there will be a definite need to move to another team based toolset with RBAC tools such as the Universal Automation offering by Adam Driscoll of Ironman Software.
Word of warning – and it should go without saying :
DO NOT RUN UNIVERSAL AUTOMATION DESKTOP ON YOUR DOMAIN COMPUTER FOR PRODUCTION OR SHARED SCRIPTS! PLEASE LOOK AT UNIVERSAL AUTOMATION FOR THAT! YOU DON’T WANT TO GO HOME OR SHUTOFF YOUR PC OR LEAVE FOR BETTER AND BRIGHTER THINGS AND GET CALLED UP BECAUSE SOME VERY IMPORTANT PROCESS DIDN’T RUN!
My Test Script - New-AzureResourceGroup
I created this function to quickly test 2 things:
-
How does Universal Automation work with 3rd party modules?
-
How does Universal Automation work with parameters and variables?
Universal Automation Desktop does not touch your scripts, in fact depending on what your use case is your git repository should be inline with Automation Desktop and you can sync the Variables across multiple installs.
My script is using 2 modules:
-
CredentialManager
-
Azure (AZ)
I thought CredentialManager would be a good test here as Universal Automation is intended to be run from your Desktop (in my case Windows 10) and using Credential Manager to store my Azure SPN details – without revealing it in plan text was a good test. More information can be found below:
#requires -Version 2.0 -Modules Az.Accounts, Az.Resources, CredentialManager


function New-AzureResourceGroup
{
  <#
      .SYNOPSIS
      Creates Azure Resource Group
      .DESCRIPTION
      Creates Azure Resource Group function, created as a test function for Universal Automation Desktop
      .EXAMPLE
      New-AzureResourceGroup
  #>
  param
  ([Parameter(Mandatory = $true, HelpMessage = 'Enter the name of the Resource Group you want to create', Position = 0)]
    [ValidateNotNullorEmpty()]
    [string] $Name,
    [Parameter(Position = 1)]
    [string]
    $Location = 'Australia East'

  )

  $tenantId = (Get-StoredCredential -Target 'MSDN SPN Demo').GetNetworkCredential().UserName
  $pscredential = (Get-StoredCredential -Target 'MSDN SPN Demo Key')

  Connect-AzAccount -ServicePrincipal -Credential $pscredential -Tenant $tenantId

  New-AzResourceGroup -Name $Name -Location $Location -Force
}

New-AzureResourceGroup